
A different Spotlight Saturday!
This week I'm going to suprise you all with a totally different thing!
Let me start with telling who I am.
My name is Marion and together with Jan we have the honor to write on this blog of
Michelle Perkett.
Every other week Jan and I host a new challenge for you girls. And Next to that
Jan introduces the Mermaids that are in the Design Team on Thursday over here!
This way you all get to know us a little better.
And the Spotlight Saturday is my contribution every week.
I try to be a bit personal and give you a glimpse in my thoughts and show you more images from Michelle through the work of her Fabulous Mermaids.
But this saturday I'm going to something different.
On the CDAC group there were some lovely comment on the red hair that I colored on my Tag with Carmen Cupcake. And I asked the girls there if they would love to see a little tutorial about that. And they said that they would love to see that...
So here I go with a tutorial for all of you!
How to color Red Hair:
I will try to show how I color red hair in an image.
Unfortunally I don’t have a video camera to film it so I did it step by step with photo’s. I hope that all is clear.
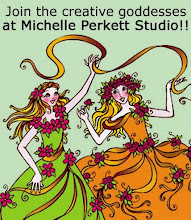
For this I use the imge from Michelle that is called Oceana.
You all now her cause it’s the Logo of Michelle Perkett Studio.

In this image I didn’t work to much with lightfall to keep it more simple!
If you are more experienced you can add this to this technique as well!
Of course there are many more varieties to color red hair.
Just print out a view images and practice and try out colors you like!

I start with the darkest color in this case E08. I look were the dark places in the hair are and color them. It’s mostly the parts were hair is coming from under other hair or when it comes from behind the shells and pearls in this case.
~~~

The next step is with copic color E99. I go over the E08 and make it a little larger.. this way the colors will blend a little. Don’t mind if the blending isn’t getting right yet.
We work on that later.

The next step is with the color E97… and we do the same as the step before this. We go over the E99 and a little further in the white areas. Again the blending is not good but we work on that later with our last color.

Now we take E95 and fill in the white spots that are left in the drawing.
When you do this you can go over all the colors. This way you take some color from the darker markers and spread it and blend all colors together.
Now the first layer of you image is colored with the first layer.

Then I will start again with the darkest color E08 and do all the steps over on some places in the hair to add more depth to the image. You can do this several times till you have the depth and color that you like.

I hope you all like this technique and I’m asking you to give it a try with al kind of colors for hair. It’s so much fun to do this. And if you don't get the result the first time... then do it again. I practiced a lot and many first try images ended up in the paper basket! So don't give up!
Please show us your results at the CDAC group.
If you still have questions about this technique please feel free to email me privately at cardsbymarione@yahoo.com
Thanks for looking and leaving a lovely comment
Hugs Marion


Awesome! I'm totally new to the Copics and don't think I will get them soon.
ReplyDeleteI just started with Derwent Coloursoft pencils but I think the technique is pretty much the same. I'm going to try out building up from dark to light! :)
Warm hugs,
Sandra
Fab tutorial Marion, Princess Oceana looks stunning!! I'm going to give it a try with my promarkers this afternoon, thank you
ReplyDeleteClaire xx
Hi Marion
ReplyDeleteGreat tutorial for red hair, will definitely give it a try, thanks for posting this!
hugs Marilyn
thank you SO much Marion!!! I LOVE this and would love to see more tutorials on hair coloring please ;)
ReplyDeleteMarion, you do a beautiful job! She is gorgeous
ReplyDeleteShelley :)
Thanks so much for this tutorial. The results are just beautiful!
ReplyDeleteThanks for the tutorial. It looks great.
ReplyDeleteA fab tutorial Marion. I do roughly the same with my promarkers, but go from light to dark. I'll have to try dark to light for a change.
ReplyDeleteI don't know if you realise you have word verification on.
Julie W x
I understood everything, no video needed. :-) Thanks for a great tutorial, I'll have to give it a try with pastels.
ReplyDeleteMarion, thank you so much for the hair coloring tutorial! Your markers colors are new to me for red hair and I'm going to try them out! It looks like I'm not the only one who would love to see coloring tutorials ;) You might have a new job my friend ;) Thank you for sharing your awesome gifts and talents with us!
ReplyDeleteOMG, Marion!! This is amazing!! I LOVE your tutorial, you are definatley an expert on coloring hair! So much fun to see the transformation! What detail and depth you've added to her hair and the pearls look so real! Wonderful tutorial, Marion!! Thank you!!:)
ReplyDeleteAwesome tutorial Marion! I will give it a try!
ReplyDeleteYour coloring is always so beautiful!
Hugs, Tammy
Thanks Marion for an awesome tutorial I just need to get 2 of the 4 colours that you used and I'll be trying it out
ReplyDeleteWow, fabulous tutorial Marion!! Can't wait to give it a try!!
ReplyDeleteHugs!
~M
Stunning tute Marion, i am now so much the wiser, now just to get copics................lol
ReplyDeleteThis is so beautifully done! And very interesting for me because I´m a beginner in colouring stamps and never used copics or promarkers. Thank you for showing!
ReplyDeleteHave a nice week!
Susan